Do you like winning things? I do. It doesn’t happen very often. Probably because I don’t enter many competitions. Well just recently Mr. & Mrs. Remodel won a contest. Well, it wasn’t really a proper contest, and it wasn’t us, it was our driveway.
Our community’s HOA board went walkabout around the neighbourhood and our driveway was voted the worse one! The result? A new driveway to be laid as soon as we stop having trailers and heavy lorries sitting on it.
In accepting this award, I’d just like to thank everyone who made it possible. The former owners who parked their oil-dripping vehicles on the driveway, not to mention other undefined stains; for the area’s moveable soils that often causes concrete to rise up and crack; for the other residents in the community who paid their monthly dues allowing there to be money in the kitty to hire men and buy concrete to fix an ugly eyesore; and lastly to Mr. Remodel and myself for having the courage and insight to accept this driveway into our lives believing that one day it would be beautiful. Thank you.
Tuesday, June 29, 2010
Wednesday, June 23, 2010
In and Out
When you are leaving some of the walls in place while building new ones, and you have helpers that don’t understand the changes like the person who designed it (Mr. R) some sort of guide is needed. So Mr. Remodel prepared the forms and laid them out for Mr. Fix-It and his helpers.
These forms are made from pesticide-treated wood identified by its a greenish tinge. Eventually they will be bolted to the cement so that the studs can be placed on top. The forms are treated as a first line of defense against termites that may find their way up into the house through a crack in the cement. Because the wood is coated in poison, it is advisable to handle it with gloves on.
Here we can see the forms on the ground delineating the different spaces. In the far back there is the space for the art studio’s closet. The new walk-in closet space in the middle space (with the old entry still in place) and in the foreground to the right is a shortened clothes closet. The line where the vinyl starts shows where that clothes closet (and the one opposite) used to end and where the bathroom started. Although both closets will still remain, albeit smaller in size, they will feel more like they are a part of the bathroom than before thereby additionally increasing the size of the bathroom as a whole.
Here are the forms looking from the old living room entry.
Here they are looking from the art studio. I think this gives a good view of the space we are gaining by doing away with the hall.
Let’s not forget what is going on above our heads. Since the bathroom ceiling is going to be removed some of what you see here will have to come down. Meanwhile, at the bottom right you can see what will be the new shower wall (with its small angled jog) making it slightly larger. But until we have an upstairs bathroom, that wall to the right of it (the present shower wall) has to stay since it is keeping the present built-in shower in place.
It’s like the game with the tower of blocks where everyone takes turns pulling out a block without making the tower collapse.
Meanwhile the other clothes closet wall has been taken down and a form put in to identify where the new wall will be, allowing for a second sink.
Tuesday, June 22, 2010
Breaking Through
Because the upstairs bathroom was still empty (we had yet to choose a tiler, or the tile), and we were living in the house, we had to have a working bathroom. So how to do you demolish some of the walls in the downstairs bathroom and build new ones while still keeping the current shower and other fixtures in place? Answer, you take out the walls the fixtures aren’t attached to, you build some of the new ones that you have the space for and leave the rest until the bathroom upstairs is completed.
Sorry I don’t have a better before picture of the master bathroom. This is looking into it from the master bedroom. As you can see we have taken out the closets that you passed by to enter the bathroom proper.
Here’s a view of the space where the closet on the other side used to be and the doorway coming in from the hall.
By incorporating the hallway space into the bathroom, we are making it more usable for us everyday rather than be helpful for the occasional guest.
Here’s what it is looking like from the other side. You can hopefully start getting a sense of the little entry area (all that will survive of the hallway) leading to the bedroom on the far left. You can see a sliver of light through into the bathroom, and to the right of the stepladder you can just see the wall opened between the hallway and the room next door (hereafter called my art studio which is what it will be).
From the above picture, you can see we have removed the studs from the new opening into the living room wall.
Now you see the studs (and what the entry from the bedroom into the bathroom looks like),
Now you don’t.
This picture also shows a nice new beam in place. In case you didn’t know it, every opening has to have a beam across it supporting what is above. This is a bearing wall so we are happy to give it all the support it needs (Go Wall).
At the bottom you can see signs of wallboard removal in the wall.
Meanwhile, down at the other end of the hallway (just a minute, let me get into position) we’d broke through into the art studio.
In case you are wondering… the purple colour is not staying.
The plan for here is to remove the studs and make a closet from the area just behind it. Because there is an electrical outlet in the section we have removed, we are going to have to re-route it to a part of the wall to the right. The building code insists on an outlet in every wall.
The art studio closet is being created from the hallway and the closet in the hallway.
This picture shows the space where the closet was. The pink ‘wall’ you can see is one side of the shower in the master bathroom.
Moving right along, we removed the studs from that opening between the hallway and the art studio and put in the required beam. At this stage, we haven’t had any inspections. Our first one will be what is called rough framing and we are quite a way away from being ready for that.
Having already taken up both carpet and carpet strip (my job) in the hallway, next to come out was the wallboard (apart from the small section opposite the new opening).
Another of Mrs. Remodel’s jobs was to remove all the nails in the studs left behind when the wallboard was pulled off. There are a lot of them. However, after proving myself capable of wielding a screwdriver (no mean feat when you started out as useless as I was/am at DIY) I was ready to wield something else. For the nail job, I got to handle a hammer AND a cat’s paw.
Removing the nails, taking out the closet fixtures, and cleaning up, is as close as I get to doing any demolition. Mr. Remodel, Mr. Fix-It, and Mr. Fix-It’s Helpers all expressed their glee in executing the demolition stage of a remodel project. I don’t see why they should have all the fun except that perhaps putting a sledgehammer or an electric saw in the hands of a DIY novice might not be the wisest action to take.
My least favourite job is sweeping up the dust. Because we are sleeping in the downstairs bedroom (we are in our 50’s and 60’s so close nighttime access to a bathroom is much appreciated), I have to sweep up all the dust made from the days work before we can clean up ourselves and then eat. Since Mr. Remodel works right up to the 6.30pm deadline for when noisy work must stop, we don’t get to eat until almost 9pm. But by then a lame microwave meal is so easy to do and eagerly anticipated.
Monday, June 21, 2010
A New Arrival
Mr. & Mrs. R would like to announce the arrival of a fridge at Chez Remodel (trumpet fanfare).
Here it is (well part of it – it’s shy) hanging out in the living room until the kitchen is done (which is months away at this stage).
It’s a Maytag French Door, freezer at the bottom model. I don’t covet much but I have wanted one of these fridges since I first saw them several years ago. I’ve tried the one door; freezer at the top mode, and the side-by-side model but this new fridge is my favourite. The fridge, which I more often is at waist and above height and I have the full width of the fridge for long trays or extra large pizzas.
No water dispenser on the front - I don’t like the space they take up. There’s a small icemaker in the freezer. The fridge will stick out a bit beyond the cabinets but it costs almost $1,000 to get one of the cabinet depth models. That’s a lot of money for less fridge space. Sorry, it offends the spirits of my frugal Scottish and Jewish ancestry who would come and haunt me were I to buy one.
Friday, June 18, 2010
Mr. Remodel, Tear Down That Wall (and that one and that one…)
If you remember, the biggest change in the house was going to be refiguring the master bathroom to incorporate the hallway, while giving a closet to the room next door. Let’s have a little reminder.
Some of this may look a bit of a jumble, so I’ll try and explain it well, but the chaos will help you get an idea of what it is to live through something like this if you haven’t already. What you have to imagine is the whole house in various states of destruction or construction at the same time for months as we moved forward in each area at different times.
The first job was to make the new opening in the living room wall into the bedroom. Here is the wallboard coming off to reveal the studs below. No prizes for guessing whose job it was to take the old wallboard out to the trailer in the driveway.
People with less experience of remodeling, or more fears, or with more money hire a contractor to do the work for them. For our project, Mr. Remodel was the owner/contractor. Mr. R’s dad did contracting work when he was growing up, plus he has his own experience of doing it as an adult, and he believes he can do anything he sets his mind to (and can learn how to do from other people). But, he doesn’t know everything about building or building codes, which has produced some interesting experiences and rethinks along the way.
One surprise was discovering the diagonal plank behind the wallboard. Ah yes, we had moved back to earthquake country which means that certain walls had to be shear walls to prevent the house doing a hula dance in an earthquake. Because we were removing part of this diagonal plank to make an opening into the bedroom, we would have to add a shear wall at the back of the master closet to replace it.
“Look Caruthers, we’ve made it old man, we’ve broken through, and we’re going to be alright”.
Thursday, June 17, 2010
And They're Off and Running…Finally
We’ve talked. We’ve disagreed (okay we’ve also argued). We’ve shopped (and there will be more shopping to come). We’ve drawn up plans, thrown them away, drawn new ones up. We’ve talked and discussed some more. Did I say we’ve shopped? But the day has finally come. We are starting work.
I presumed that we would start on one room and see it through till finished and then move onto the next one but that isn’t how it happens or happened to us in any case. We started without knowing what we were doing in all the rooms, plus sometimes there’s a hold up getting some of your materials or fixtures. Rather than twiddling your thumbs you move on. Deciding exactly what we wanted to do and finding some of the materials that fitted that concept for some of the rooms was still eluding us despite the weeks we had spent shopping, and thinking, and talking.
I’m more of the quick decision-maker, go with it, and get on with it kind of person, which has its pluses and minuses. Mr. Remodel likes to take his time and think about all the possibilities ad nauseum, which is okay some of the time since quick decisions can be a mistake. But slow can also get ever so irritating because eventually you have to make a decision and make a choice otherwise we will be trapped in this aisle for years and I thought I might do something else with the year than stand here waiting. Just pick one, anyone as long as you choose one. Please…
Which reminds me. To embark on a major remodel you have to have a good marriage/partnership because it can be testing. If you don’t know how good your marriage/partnership is now, believe me you’ll find out…
Now there was no way we could do all the work ourselves so we had enlisted the help of a friend who lives locally and runs his own handyman service.
The first thing Mr. Remodel and Mr. Fix It tackled was gutting the upstairs bathroom. One minute there was an old and funky bathroom, the next minute (or hour) there was an old and funky empty room.
It was wonderful to think that we were actually doing something concrete (or fiberglass as the case may be).
Since we had not yet found the tile we needed for walls that was as far as we got.
Next the two Mr.’s turned their attention to the kitchen. As part of the kitchen remodel its 1970’s lighting fixture was set for the chop.
We decided against removing the lowered ceiling and, since I wanted pendant lights in the kitchen, filling in the recessed area would leave the lights hanging down too low. So we kept the recess and extended it to centre it better within the space.
So down came the wooden frame, the plastic ‘glass’, the old buzzing fluorescent lights, and the wallboard.
For those outside of America who are used to houses made of brick, which is plastered on the inside, homes in many parts of America are built of wood. This is covered with wallboard, also called drywall, inside to make the walls. Wallboard is made from gypsum covered with paper. It is either nailed or screwed to the wood and then covered with wallboard compound (Pollyfilla-like stuff), which can then be either painted or wallpapered. Sometimes it is additionally covered with a textured spray (which is basically a kind of watered down wallboard compound). In our house we have what’s called an ‘orange peel’ texture because that is what it looks like.
So there it was, our newly extended recessed ceiling. The only problem was that we were three months away from getting to work on the rest of the kitchen and I now had no lighting in the kitchen. Even just throwing a ready-meal in the microwave needs light of some degree. So I’m not sure exactly why this particular job was done SO early but there it was, or wasn’t any longer whichever way you look at it.
You may ask yourself what Mrs. Remodel is doing when she isn’t throwing frozen dinners into microwaves. Well I confess to not being very handy. Maybe that is why I’m a reluctant DIYer.
One of my prime jobs is knowing where things, such as tools, are or finding them if I don’t so Mr. Remodel can carry on working. This is an extremely tedious and yet skilled job since Mr. Remodel is, let us say; from the lets leave our stuff wherever we were previously working or somewhere totally random in the house, school. You’d think looking for stuff in a virtually empty house is easy but it isn’t.
Otherwise in the beginning, I made myself useful taking out the fixtures in the closets in several of the rooms, particularly the downstairs bathroom where walls were coming out. I got a great deal of satisfaction from this and had to be restrained from taking apart anything within reach of my trusty screwdriver and me.
Check out my work removing cabinet doors. Nice job eh? Maybe I’ll turn professional.
This picture also gives a good close up of the delightful vinyl flooring and cabinet lining. The tape on the floor is to help us visualize part of the new kitchen layout.
I presumed that we would start on one room and see it through till finished and then move onto the next one but that isn’t how it happens or happened to us in any case. We started without knowing what we were doing in all the rooms, plus sometimes there’s a hold up getting some of your materials or fixtures. Rather than twiddling your thumbs you move on. Deciding exactly what we wanted to do and finding some of the materials that fitted that concept for some of the rooms was still eluding us despite the weeks we had spent shopping, and thinking, and talking.
I’m more of the quick decision-maker, go with it, and get on with it kind of person, which has its pluses and minuses. Mr. Remodel likes to take his time and think about all the possibilities ad nauseum, which is okay some of the time since quick decisions can be a mistake. But slow can also get ever so irritating because eventually you have to make a decision and make a choice otherwise we will be trapped in this aisle for years and I thought I might do something else with the year than stand here waiting. Just pick one, anyone as long as you choose one. Please…
Which reminds me. To embark on a major remodel you have to have a good marriage/partnership because it can be testing. If you don’t know how good your marriage/partnership is now, believe me you’ll find out…
Now there was no way we could do all the work ourselves so we had enlisted the help of a friend who lives locally and runs his own handyman service.
The first thing Mr. Remodel and Mr. Fix It tackled was gutting the upstairs bathroom. One minute there was an old and funky bathroom, the next minute (or hour) there was an old and funky empty room.
It was wonderful to think that we were actually doing something concrete (or fiberglass as the case may be).
Since we had not yet found the tile we needed for walls that was as far as we got.
Next the two Mr.’s turned their attention to the kitchen. As part of the kitchen remodel its 1970’s lighting fixture was set for the chop.
We decided against removing the lowered ceiling and, since I wanted pendant lights in the kitchen, filling in the recessed area would leave the lights hanging down too low. So we kept the recess and extended it to centre it better within the space.
So down came the wooden frame, the plastic ‘glass’, the old buzzing fluorescent lights, and the wallboard.
For those outside of America who are used to houses made of brick, which is plastered on the inside, homes in many parts of America are built of wood. This is covered with wallboard, also called drywall, inside to make the walls. Wallboard is made from gypsum covered with paper. It is either nailed or screwed to the wood and then covered with wallboard compound (Pollyfilla-like stuff), which can then be either painted or wallpapered. Sometimes it is additionally covered with a textured spray (which is basically a kind of watered down wallboard compound). In our house we have what’s called an ‘orange peel’ texture because that is what it looks like.
So there it was, our newly extended recessed ceiling. The only problem was that we were three months away from getting to work on the rest of the kitchen and I now had no lighting in the kitchen. Even just throwing a ready-meal in the microwave needs light of some degree. So I’m not sure exactly why this particular job was done SO early but there it was, or wasn’t any longer whichever way you look at it.
You may ask yourself what Mrs. Remodel is doing when she isn’t throwing frozen dinners into microwaves. Well I confess to not being very handy. Maybe that is why I’m a reluctant DIYer.
One of my prime jobs is knowing where things, such as tools, are or finding them if I don’t so Mr. Remodel can carry on working. This is an extremely tedious and yet skilled job since Mr. Remodel is, let us say; from the lets leave our stuff wherever we were previously working or somewhere totally random in the house, school. You’d think looking for stuff in a virtually empty house is easy but it isn’t.
Otherwise in the beginning, I made myself useful taking out the fixtures in the closets in several of the rooms, particularly the downstairs bathroom where walls were coming out. I got a great deal of satisfaction from this and had to be restrained from taking apart anything within reach of my trusty screwdriver and me.
Check out my work removing cabinet doors. Nice job eh? Maybe I’ll turn professional.
This picture also gives a good close up of the delightful vinyl flooring and cabinet lining. The tape on the floor is to help us visualize part of the new kitchen layout.
Wednesday, June 16, 2010
Born to Shop (or is that Bored?)
Ah the shopping… Looking for ideas, looking for the items to replace every fixture and fitting in the entire house.
It starts out fun but for Mrs. Remodel (who isn’t keen on shopping at the best of times) it gets old quite quickly. And there comes a point when I get decision fatigue. There are times when at the end of yet another marathon shopping expedition when I don’t even want to have to make the decision as to whether I want the receipt with me or in the bag.
We went to every DIY, tile, lighting, home décor shop we could find. There are a lot of people in Southern California with a lot of money and some of the shops are more than ready to help them spend a good portion of their money on items that don’t seem to fully justify, in my opinion, the high price tag. Though most of these items were not particularly beachy so we were rarely disappointed to find the perfect fixture we dearly wanted cost an arm and a leg, and then another arm.
Pendant lights are back in. I liked the prices at Lowes: $22 - $40 each compared with $300 - $500 each in some shops.
We are thinking pedestal sinks since the bathrooms are quite small.
Or perhaps a freestanding sink like this one from IKEA.
A little showy for our version of beach style.
We want good flushing action with low water usage. The toilets in the house are from 1979 and 1987.
If I had a dollar for every tile design I’ve looked at I could afford to pay someone to go shopping in my place.
Does it look like sand – or is it too bland? What do I think or care after five hours of shopping?
Fans come in three groups. Completely ugly; nice until they team it with an ugly light fixture; nice with a just about bearable light fixture.
Monday, June 14, 2010
Decisions, Decisions
You might be interested in how we decided on our décor for the house. When Mr. Remodel and I got married we agreed that we wouldn’t do anything in the house that both of us didn’t like (I take that back – I mean decoration-wise. Mr. Remodel frequently puts tools and the like on my kitchen counters, which I do not like). This sometimes means that ideas or designs that the other loves is hated by the other and doesn’t get realised but this is both our home. Disappointment is passed over quickly in order to find the design that we both agree on.
Budget also comes into it. We are not millionaires and there are other things we like to do with our money aside from playing dress up with houses. We work with the savings we have and do not take out loans for any improvements so we are not left paying for it long after the work is finished.
We brainstorm ideas, look at magazines, draw on ideas we’ve had in the past if they suit the circumstance, and shop to see what’s out there to help us to realise our vision (sometimes an item in a shop will provide the idea itself). Sometimes compromises have to be made but they in turn can allow a splurge in another areas where substitutes just won’t do. Like the 2” x 6” tile border that fitted the downstairs bathroom design so perfectly but which cost $16 a piece.
Sometimes it comes down to making what we want (correction: Mr. Remodel makes what we want) because it isn’t available or ridiculously expensive. Like the shell lamp we saw in Hawai’i when we renovated a home there. $525 for a large shell drilled to a piece of wood to hang on the wall. A $35 shell from a local market of the same size and shape, $5 in electrical parts from ACE, a piece of wood from some left over lumber and hey presto! A beautiful lamp for the fraction of the cost.
Because we were back living at the beach and because we still had our tropical-looking furniture from Hawai’i, it was no surprise that we decided on an overall beachy theme. The trick was how to express that in a stylish and budget-conscious way.
Saturday, June 12, 2010
Of Mice and Men
Because we decided to do this properly, or rather legally, we had to have plans drawn up for the permit office at city hall. Mr. Remodel drew up the upstairs bath plan on some squared paper, as it was pretty simple. We were keeping all the fixtures in the same location to save money and because the room is too small to re-arrange them in any other way that made sense.
Instead of the one-piece bath and shower unit that was in there, Mr. Remodel wanted a claw foot tub made by American Bath Factory that had an air system which blows air from small holes in the floor of the tub rather than jets of water from holes along the side.
Mr. Inspector wanted some documentation on it before the office would approve the plans because he’d never come across a tub like this before. Unlike jet tubs where the pump is totally enclosed with an access panel, the air system has a free-standing unit that looks like a little pig and stands under the tub attached via a hose, Mr. Inspector was concerned that no one got electrocuted should they leaned out of the bath and touch the unit so he wanted to get some safety information to ensure that it had all been tested. ABF couldn’t understand what was wanted and said they didn’t have any documentation. Could they contact their factory in China where the pig is made? Apparently not but they would give us the e-mail address of their man in China so we could ask him. Given the time difference, Mr. Their Man in China got back to us very quickly with the safety certification that made Mr. Inspector a happy man and got our permit accepted.
The downstairs plan needed a more professional presentation because it was more extensive and involved moving walls. So we enlisted the services of a friend, who lives locally, in the interior design business who draughts plans among other things.
For downstairs our plan was to completely gut the kitchen and put in all new cabinets in a new configuration, while keeping the location of the plumbing and one of the gas lines where they were (again to save money). In addition we were going to make some major changes to the downstairs bathroom. When we bought the house, the bathroom downstairs was both the bathroom for the adjoining master bedroom and for guests who could access the room via a door off of a small hallway off the living room.
This shows the entry into the hallway. The door you can see is the one guests use to go into the bathroom. To the right is a small closet; to the left is where you walk further along to the master bedroom.
Since there is just the two of us, and that is who is going to be in the house 99% of the time and since the second bathroom is right at the top of the stairs, the hallway seems, to us, to be a waste of space. So we proposed closing up the doorway to the hall and opening one further along the wall to make a shorter entry into the bedroom. Part of the closet in the hall and part of the hallway itself would be made into a closet for the room on the other side of the bathroom, which didn’t have one. The guest door to the bathroom and its adjoining walls would be taken down and refigured into a slightly larger shower, and a newly created walk-in closet in the bathroom.
The original closets, one on either side, where passed by when entering the bathroom from the bedroom. Both would be shortened. The one on your left on the plan below would remain a clothes closet. The one on the right would be significantly shortened to become a linen closet allowing a second sink to be put in.
Apart from adding a second sink, which feeds off of the plumbing from the original sink, again, all the plumbing remained in the same place saving both time and money. Yet, despite this, you will see that we have effective a radical change in both bathrooms and kitchen from what is there now.
The black lines represent new walls.
Friday, June 11, 2010
The Heat is on (albeit briefly)
Soon after we moved in, California experienced some colder than usual temperatures which would have been fine except that by then we had added the furnace to the list of things in the house that didn’t work. There was a gas fireplace living room but it wasn’t putting out a lot of heat. We went out and bought some more blankets and a small ceramic heater but it was pretty freezing cold first thing in the morning and at various other times of the day. We wore our coats a lot in the house. And yes I will confess it now; I skipped a few showers rather than get completely undressed.
After some Internet research, we chose the company that could do the work the quickest but who also sounded like they knew what they were doing. However, the worker we ended up with didn’t have any experience with installing the new generation of higher efficiency furnace we chose. We didn’t know this. If we had knew replacement furnaces shouldn’t take eight hours to install we might have realised something was wrong. We were given a small clue when the installer’s brother (who was supposed to be doing the job but had gone instead to another job) came over at the end of his job and they started whispering to each other upstairs (where the furnace cupboard is located).
We used the eight hours talking about design ideas so the time wasn’t wasted but neither was standing up in our coats up against the fireplace to garner what little heat it was giving off, the best time in California I’ve ever spent.
But, finally the job was finished, the furnace was turned on and we could feel the magical elixir known as warm air blowing out of the vents. So all seemed well.
Opening the door to look at the furnace, we noticed it was a little warm in the cupboard it stood in. That was because the silver foil material you can see above the furnace wasn’t sealed properly and heat that should be going through the system and onto us, was heating the furnace cupboard instead.
We left a message with the owner and he came out the next day (Saturday) to look at it. He said a new crew would come out on Monday with him to supervise. In the meanwhile we would put the furnace on for short periods but otherwise it was back to the ceramic heater.
Monday came and the same two workers showed up without the owner. They worked for several more hours and declared the problem fixed. The inspector showed up in the afternoon and agreed with us that the problem was not fixed and it failed its inspection. Another call to the owner. Absolutely a new crew would be back out there tomorrow. Sadly, they obviously got kidnapped by the old crew because the old crew was who showed up. In spite of this (chorus of trumpets sounding) whether by luck, or by judgment, they sealed the system up correctly and the while the furnace pushed out its hot air, the cupboard remains cool.
Food For Thought
One of the things I dislike about remodeling is the food. There are times of undefined length where we are eating microwave meals. Either because the kitchen is out of operation or because we are so busy right up to the time we need to eat RIGHT NOW because we are so hungry.
At times like this there is the choice of going out to eat (takes too long and really adds up when you need your money for nails, lumber etc.) or eating five-minute microwave meals.
This is better for Mr. Remodel than for me. I am a vegetarian and the availability of TV dinners for the non-meat eater is pretty slim. There’s macaroni cheese, and there’s ravioli and that’s more or less it. Interestingly, neither of these have any vegetables in them. Whereas the meat meals have stacks of veggies in them and there is a huge choice. I did recently discover another version of the ravioli dish with butternut squash instead of cheese as a filling, and a large helping of vegetables so I’ll probably go out and buy large quantities of them until I can’t face another. Costco sell a pack of ten small vegetable lasagnas, which I have eaten more of than I would care to otherwise in a six-month period, which for a while relieved the meal boredom by about 1%.
Oh okay, I’ll admit it. Since we did our last major remodel ten years ago, the average US supermarket has now dedicated half a frozen food cabinet to vegetarian ready meals. But they are small and, again, a little pricey for the size. Just because I am a vegetarian doesn’t mean I want to eat the same amount as a stick insect. And with the wads of cash I’m showering on the workmen and various home improvement shops, I don’t have $6.99 to throw away on three mouthfuls of organic frozen pasta and cheese.
Thursday, June 10, 2010
Christmas Camping
Originally, we were just going to replace both bathrooms (including moving walls in the one downstairs), replace the carpet, and paint. But as we delved deeper into the condition of the house, we started adding more things that we wanted to change. Although this meant having to expand our budget, we were able to stretch it further through some of the choices we made.
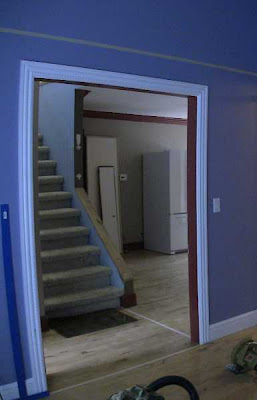
When I showed this pictures to some friends, they thought the place looked pretty good but it is quite deceiving. The lovely wood floor (¾” Yonkers floor from Denmark) had been abused (apparently the prior owners children had ridden their bikes indoors on rainy days – I might understand this in Seattle but seriously, how much rain does So Cal get?). The molding at child height had been badly banged about and the walls were covered in large areas of Spackle (Pollyfilla for those in the UK). The prior owners had done this to fill in the nail holes from pictures and other fixtures and they probably thought they were being helpful. However, a small nail hole does not need a six-inch patch of uneven Spackle over it to fill it in. There were patches like this all over the house and if left and painted over would have created large flat areas on the textured walls.
You can see one of these patches through the doorway in the above picture.
So one of the first we did was to clean all the Spackle off of the walls. The second was to clean the house from top to bottom. Even though the house was soon going to get dirty and dusty from the remodel, at least it would be our dirt - not somebody else’s.
Since we had come to the conclusion that the house needed a complete remodel, we decided to move in a minimum of furniture. That way we would room to work and so we didn’t cover our stuff with dust. So in came a table and two folding chairs, a blow-up mattress on the floor, a microwave, a few clothes and lots and lots of tools (which had been supplemented from Mr. Remodel’s already extensive collection with additional items that were deemed absolutely necessary and which were on sale and that he had always wanted and never got).
Six months later we are still sleeping on the floor. We have added a couple of Poang armchairs from IKEA and a TV someone gave us but essentially we are still camping out.
Spending Christmas in an almost empty run-down house without a fridge and some dodgy appliances was not the most festive we’ve ever spent. Christmas dinner was two rather unappetising microwave dinners, which made a big mess because they had thawed. The outer packaging was waxed paper, which had gone soggy and kept tearing as I put them in and out of the microwave. A cooler is great for keeping things cool but does noting for keeping things frozen. Plus it is shocking how quickly ice melts even in winter, even with the cooler in the garage.
But I was grateful that I had a roof over my head and that we had moved back to the beach (walking on an almost deserted beach on Christmas Day was magical). And because I was clueless about how dusty it would get and how long it would all take.
Originally, we were just going to replace both bathrooms (including moving walls in the one downstairs), replace the carpet, and paint. But as we delved deeper into the condition of the house, we started adding more things that we wanted to change. Although this meant having to expand our budget, we were able to stretch it further through some of the choices we made.
When I showed this pictures to some friends, they thought the place looked pretty good but it is quite deceiving. The lovely wood floor (¾” Yonkers floor from Denmark) had been abused (apparently the prior owners children had ridden their bikes indoors on rainy days – I might understand this in Seattle but seriously, how much rain does So Cal get?). The molding at child height had been badly banged about and the walls were covered in large areas of Spackle (Pollyfilla for those in the UK). The prior owners had done this to fill in the nail holes from pictures and other fixtures and they probably thought they were being helpful. However, a small nail hole does not need a six-inch patch of uneven Spackle over it to fill it in. There were patches like this all over the house and if left and painted over would have created large flat areas on the textured walls.
You can see one of these patches through the doorway in the above picture.
So one of the first we did was to clean all the Spackle off of the walls. The second was to clean the house from top to bottom. Even though the house was soon going to get dirty and dusty from the remodel, at least it would be our dirt - not somebody else’s.
Since we had come to the conclusion that the house needed a complete remodel, we decided to move in a minimum of furniture. That way we would room to work and so we didn’t cover our stuff with dust. So in came a table and two folding chairs, a blow-up mattress on the floor, a microwave, a few clothes and lots and lots of tools (which had been supplemented from Mr. Remodel’s already extensive collection with additional items that were deemed absolutely necessary and which were on sale and that he had always wanted and never got).
Six months later we are still sleeping on the floor. We have added a couple of Poang armchairs from IKEA and a TV someone gave us but essentially we are still camping out.
Spending Christmas in an almost empty run-down house without a fridge and some dodgy appliances was not the most festive we’ve ever spent. Christmas dinner was two rather unappetising microwave dinners, which made a big mess because they had thawed. The outer packaging was waxed paper, which had gone soggy and kept tearing as I put them in and out of the microwave. A cooler is great for keeping things cool but does noting for keeping things frozen. Plus it is shocking how quickly ice melts even in winter, even with the cooler in the garage.
But I was grateful that I had a roof over my head and that we had moved back to the beach (walking on an almost deserted beach on Christmas Day was magical). And because I was clueless about how dusty it would get and how long it would all take.
Wednesday, June 9, 2010
What we started with
Because I am starting this months after we actually started the remodel, I don't have all the before photos I would like. We do have a video we took just prior to buying the home but Mr Remodel is too busy remodeling to edit for me! So I may show it at the end when we finally finish followed by a video of what it looks like now to get the full effect.
For now though here are the pictures I do have.
This shows the upstairs toilet that was leaking and the old and funky sink. Old and funky are words we used quite a lot to describe the fixtures throughout the house.
The house was built in the 1970's and although some improvements had been made in the living room and kitchen, most of the fixtures were, or at least looked, like they were the originals and they had not worn well.
Here is another view of the sink in the upstairs bathroom. I don't know if someone decided to paint it on purpose or if the previous owner's children had poured paint down there and not bothered to clean it up. Whichever it was, it was very reluctant to come off no matter how hard I scrubbed.
This is the kitchen (obviously). It doesn't look too bad from a distance, but the dishwasher didn't work and looks like it fitted in its space properly. the tile was cracked and broken in places, part of the oven was missing although it did work. The floor vinyl, which looked original, was very ugly and incredibly dirty and the cabinet doors look more beaten up on the front than the photo shows, while the insides were original to the house, of very cheap quality and lined with a rather unsavoury-looking liner that was equally as distasteful to touch.
Here we go!
My very first posting on my very first blog. Both scary but exciting. Scary because I am not good at following written instructions (I'm more a visual learner), but exciting because my friends around the world can follow our journey as we remake this new house with our own taste and style.
The home is situated in Southern CA and has four bedrooms and two baths. We bought it a few months ago and have been working on it almost full-time since then. It was a short sale which means that the bank allowed the previous owners to sell it for less than the amount owed.
It was in quite a state when we took possession of it. Several of the appliances were not working. The water to the upstairs toilet was turned off because it was leaking (though this didn't stop someone from using it and leaving a very full bowl for us to find) and the carpet had quite a few additional black stains on it that were not there when we first viewed it. Oh and it was generally very dirty from top to bottom. Obviously no effort had been made to clean it up and several items of junk were left behind for us to deal with including an old and extremely heavy water softener. But Mr Remodel and I saw potential.
Some initial pictures to follow and more postings when I get more use to how this thing works.
Subscribe to:
Posts (Atom)